How to Annotate Screenshots for Clear Communication with CleanShot X
A screenshot without context makes people work to understand it. I use CleanShot X's spotlight, arrows, and redact tools to make it obvious what I'm showing before I send it.

A screenshot without context makes people work harder than they should. They scan the image trying to figure out what you want them to look at. CleanShot X has annotation tools that do that work for you, so the person receiving it immediately understands what you're showing them.
I use annotations for everything: bug reports, sharing ideas with colleagues, tips for friends, feedback on designs. The goal is always the same: make it obvious what matters in the image.
The tool I reach for most is Spotlight. Press H, drag over the area you want to highlight, and everything else dims. The viewer's eye goes exactly where you want it. For bug reports especially, this cuts through the noise. Instead of "look at the top right corner, no not that bit, the button below the header," you spotlight the element and it's done.
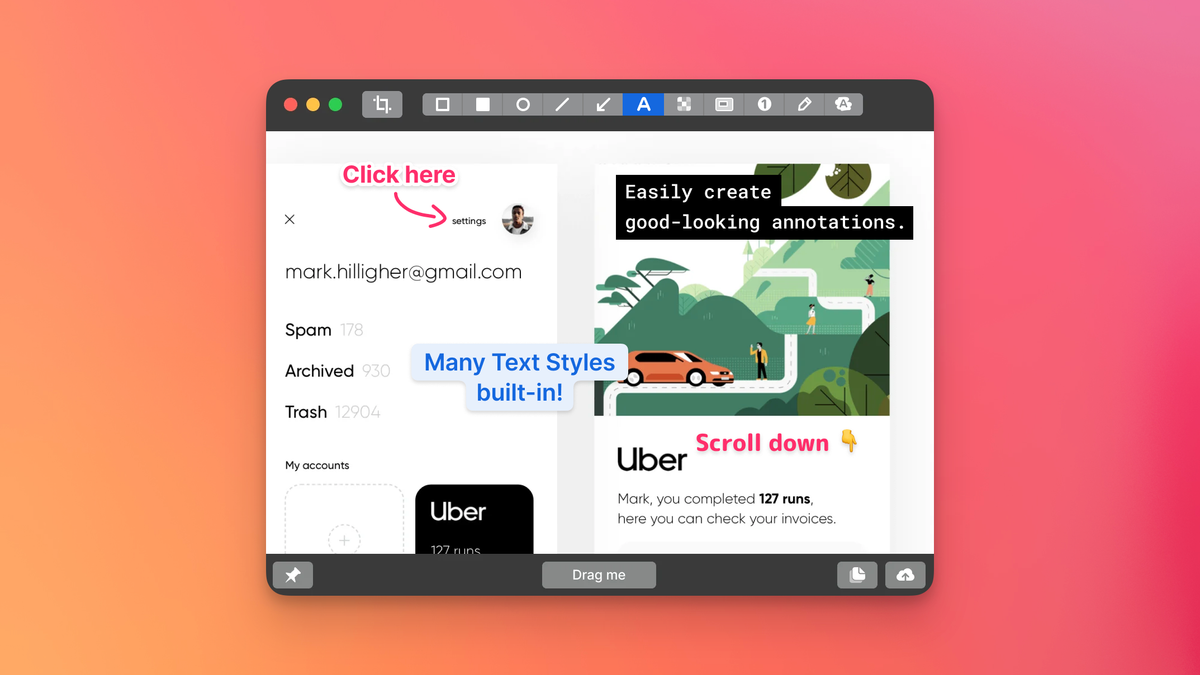
Arrows are the other constant. Press A, point at the thing. Simple, but it removes ambiguity. When I'm explaining where a setting lives or highlighting a UI element someone can't find, an arrow gets the job done faster than describing it in text.
For anything with sensitive information, Redact (P) blacks out what shouldn't be shared. Account numbers, email addresses, customer data. One quick drag and it's gone before you share.
Text labels (T) let you leave thoughts directly on the image. "This should be aligned with the header" or "Bug: this button does nothing" right next to the element you're discussing. The context stays with the visual instead of living in a separate message.
You can annotate immediately after capturing, which is how I usually work. But you can also open any existing image in CleanShot and annotate it, which is useful when someone sends you a screenshot and you want to mark it up before responding.
For anything that needs to look polished, like documentation or presentations, the background and framing tools add padding and clean up the edges. It takes a raw screen grab and makes it look intentional. I don't use this for quick bug reports, but for anything external-facing it's worth the few extra seconds.